
No-Bake Lotus Cheesecake: the Recipe for a Creamy and Delicious Spring Dessert!

Are you a fan of cheesecakes? Love the flavor of Biscoff? Then this recipe will soon become your new favorite. No Bake Lotus Biscoff Cheesecake is the perfect blend of creamy, sweet, and crunchy. Made with a buttery Lotus Biscoff crust, smooth and rich cream cheese filling, and a generous spread of Lotus Biscoff spread on top, it’s everything you want in a dessert. To make it is easy, create a cake base with blended Biscoff biscuits and butter, then top with a whipped mixture of cream, cream cheese, and Lotus Biscoff cream. After refrigeration, the cake is ready to be topped with another round of Lotus Biscoff cream. Yum! Whether you're looking for a sweet treat to enjoy with friends or want to impress dinner guests, this cake is sure to satisfy. Do remember though, the cake needs time to set in the fridge, so make sure to consider this if you’re making them for a special occasion.
What is Lotus No-Bake Cheesecake?
Lotus Biscoff Biscuits were created by Belgian baker, Jan Boone, in the 1930s. The name comes from the combination of the words “biscuit” and “coffee” since the two are a popular and loved duo. These cookies are a type of shortbread with a lot of spices (nutmeg, cinnamon, allspice, etc.) and have a deep caramel flavor. It’s this caramel flavor that works so well with a creamy dessert. The cookies are used in the base, while the Lotus Biscoff spread (or cream) is used for the filling and topping.
Tips
- For best results, use full-fat cream and not low-fat.
- Instead of a Lotus cream on top, you can also top the cake with caramel.
- If you can’t find Lotus Biscoff cookies in a store near you, you can also use speculoos cookies.
- For best results, use Philadelphia cream cheese. You can also substitute the cream cheese with a high-quality mascarpone.
How to Store No-Bake Lotus Cheesecake
The Lotus Cake can be stored in the refrigerator (in an airtight container) for up to 3 days.
Where Do I Find Lotus Cream?
Lotus Cream is a type of cookie butter. Look for it in the same aisle as Nutella and other sweet spreads.
Can I Make It Ahead of Time?
This recipe is great for making ahead of time as cake can be covered with plastic wrap and stored in the fridge until you’re ready to serve it.
Can I Freeze No-Bake Lotus Cheesecake?
Yes, you can! Store it in an airtight container for up to 3 months. Allow to thaw in the fridge, or serve slices frozen, directly from the freezer.
Can I Make Mini No-Bake Lotus Cheesecakes?
Yes, you can make mini cakes by using a mini muffin pan. Follow the recipe as you would, but instead of making one large cake, you make small ones!
How To Melt the Lotus Cream
To melt Lotus cream, spoon it into a microwave-safe bowl and microwave on low for 10-20 seconds.
Ingredients
How To Make No-Bake Lotus Cheesecake
;Resize,width=712;)
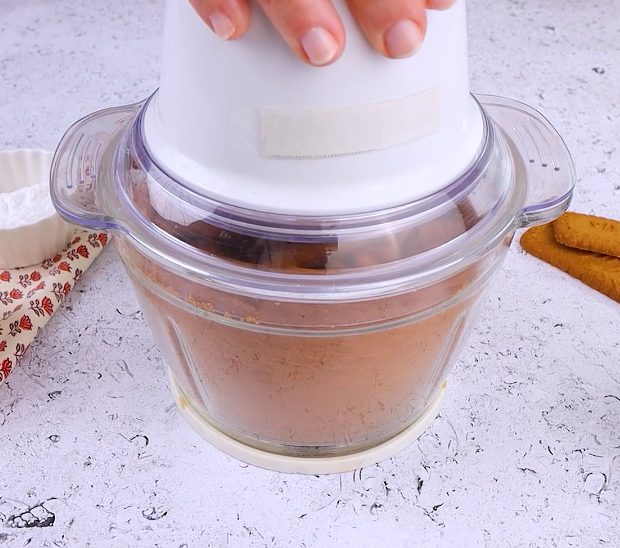
Add the lotus biscuits to the food processor and mix until crumbly.
Add the lotus biscuits to the food processor and mix until crumbly.
;Resize,width=712;)
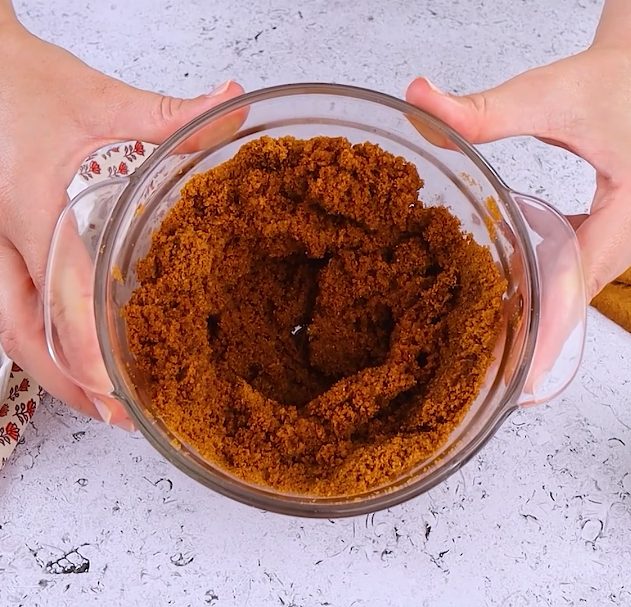
Add the melted butter and continue mixing until combined.
Add the melted butter and continue mixing until combined.
;Resize,width=712;)
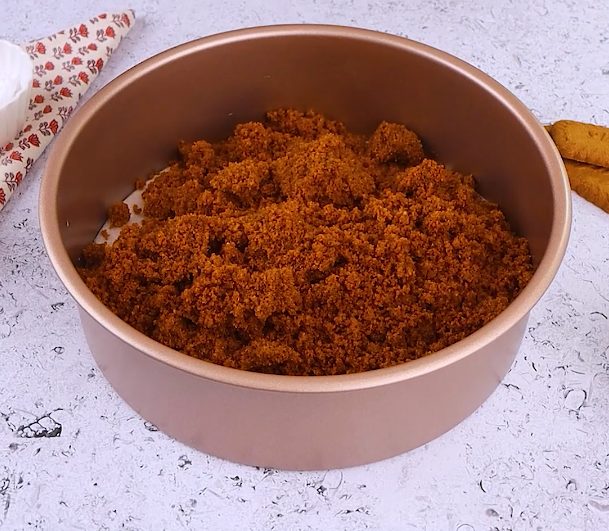
Pour the biscuit base into the cake mold (20cm/8-inch size) lined with parchment paper.
Pour the biscuit base into the cake mold (20cm/8-inch size) lined with parchment paper.
;Resize,width=712;)
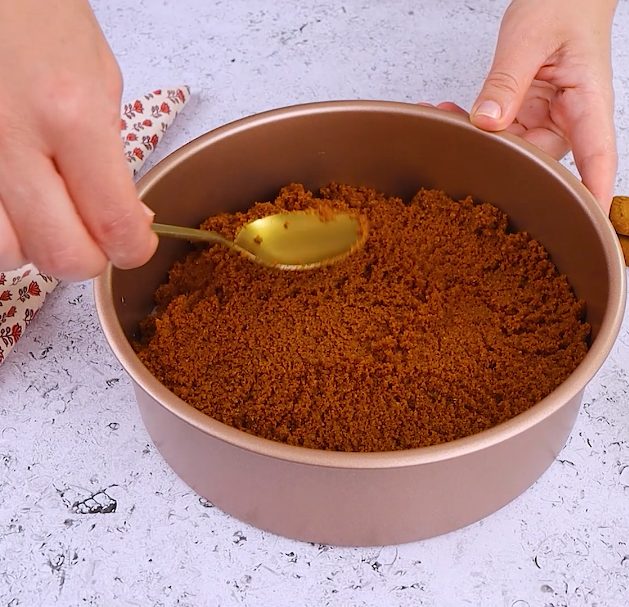
Press it well with the help of a spoon to create a base for the cake. Refrigerate for one hour.
Press it well with the help of a spoon to create a base for the cake. Refrigerate for one hour.
;Resize,width=712;)
In a bowl, add the heavy cream and mix with the electric mixer until thickened.
In a bowl, add the heavy cream and mix with the electric mixer until thickened.
;Resize,width=712;)
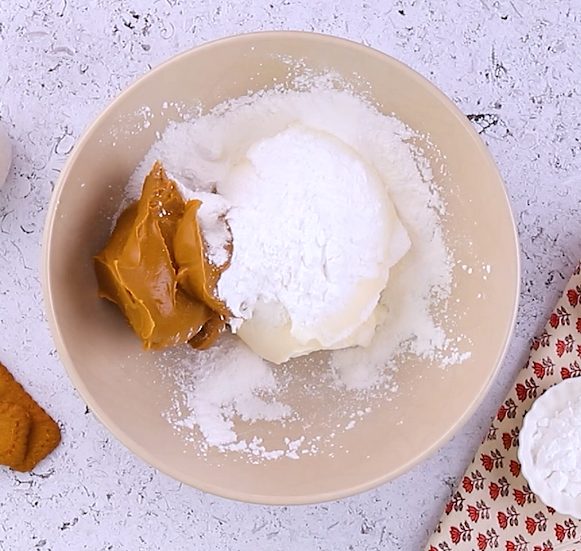
In another bowl, add the cream cheese, lotus cream, and powdered sugar and mix with the electric mixer to combine.
In another bowl, add the cream cheese, lotus cream, and powdered sugar and mix with the electric mixer to combine.
;Resize,width=712;)
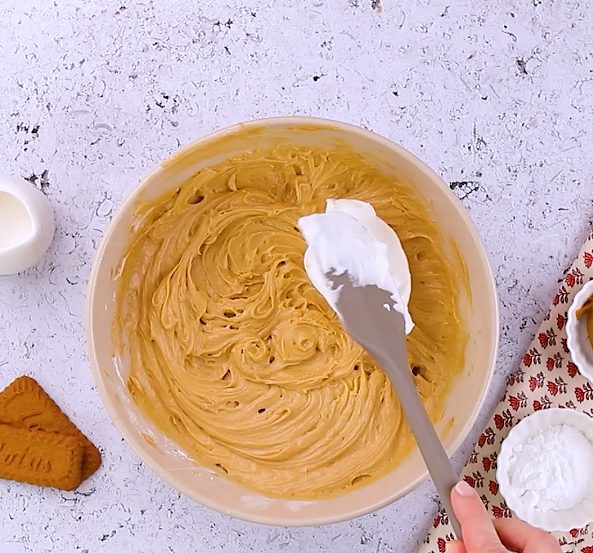
Add the whipped cream to the mixture and fold it in with a spatula to combine. Don’t over-mix!
Add the whipped cream to the mixture and fold it in with a spatula to combine. Don’t over-mix!
;Resize,width=712;)
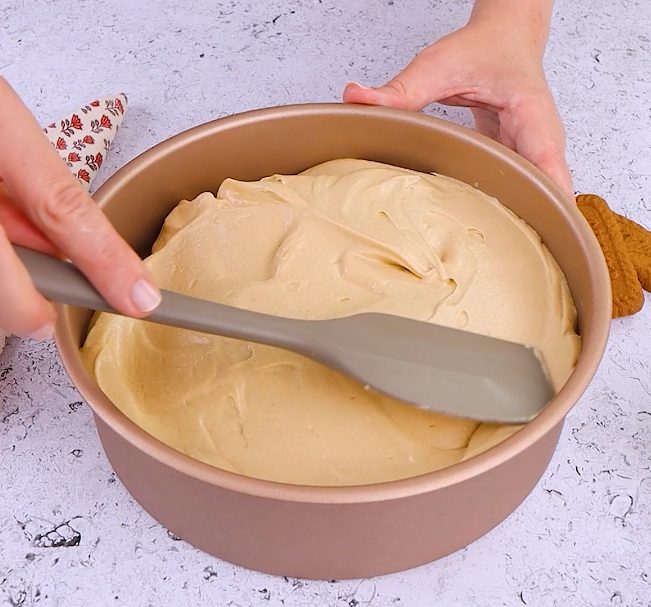
Remove the base from the fridge and pour the lotus cream on top. Use a spatula to level the mixture and to make it smooth. Refrigerate for at least 4 hours.
Remove the base from the fridge and pour the lotus cream on top. Use a spatula to level the mixture and to make it smooth. Refrigerate for at least 4 hours.
;Resize,width=712;)
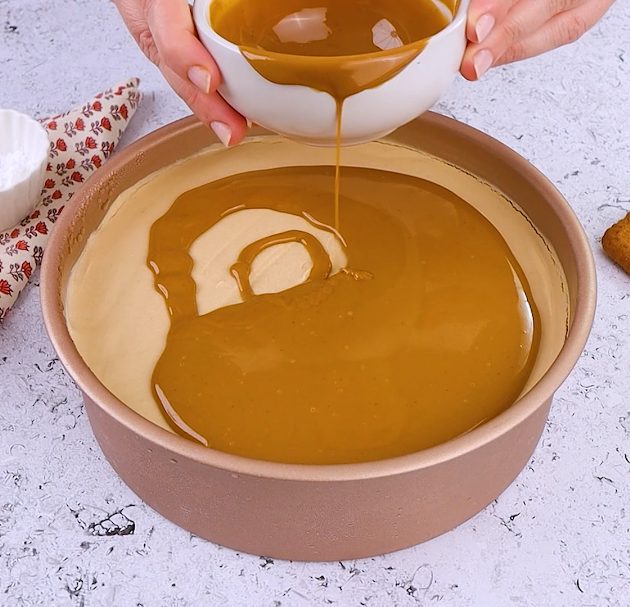
Now pour the lotus cream on top and transfer again to the fridge for 15 minutes.
Now pour the lotus cream on top and transfer again to the fridge for 15 minutes.
;Resize,width=712;)
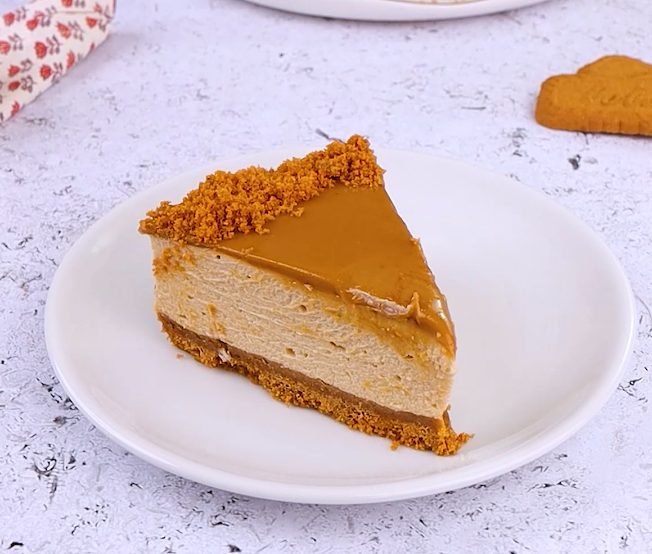
Decorate the cake with the lotus biscuits and the rest of the cookie base. Cut on slices and serve.
Decorate the cake with the lotus biscuits and the rest of the cookie base. Cut on slices and serve.

;Resize,width=712;)

;Resize,width=767;)
